DIY Bed Bug Control
If you’re looking for a way to start your own DIY Bed Bug Control, then look no further than this article. Within you’ll find some helpful tips and great ideas to get started.
Can It Be Done?
The simplest answer is “yes,” but you should know that by taking care of the problem yourself, it’s going to be more of a daunting task. It can be cheaper than hiring professional pest control, but the likelihood of succeeding can depend on many individual factors like how many are present, how much home clutter you have, whether neighbors have had bed bugs, and if all the residents of the affected building will participate in the process. If you want the greatest chance of success, everyone will need to do their part.
Step 1: Identifying a Problem
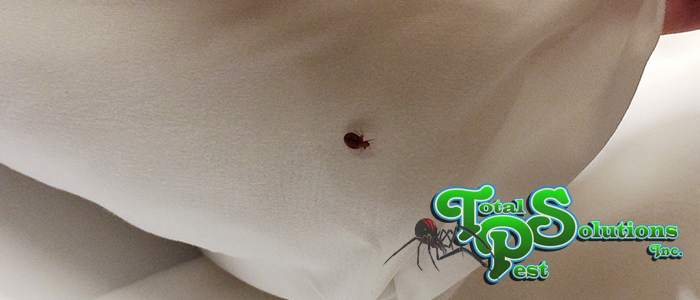
You may think you know what a bed bug looks like, but to be perfectly sure, you’re going to want to positively identify the problem pest. If you can, either catch a live one or collect a dead one of your unwelcome houseguest show it to an extension agent or other insect expert. They will know your local area and pest control, and will usually identify the pest at no cost to you.
If whoever you’ve brought the sample to makes a positive I.D of the pest as a bed bug, immediately notify your landlord if you live in an apartment, as the units near yours should be inspected for bed bugs as well. Be sure to check the housing codes in your area, as your landlord may be obligated to participate in treatment. You should also inspect areas you suspect may have bed bugs and the surrounding living areas to get an idea of the extent of the infestation.
Step 2: Making a Plan for Bed Bug Control
It never hurts to have a plan, and good planning can be an important component of controlling your bed bug infestation. For the steps you intend to take, create a schedule for completing each task and include any vacations or other personal plans that may interrupt.
Take notes on the entire process, like dates and exact locations that you find the bed bugs so you can track your progress and have a better idea of where to focus your attention. And for at least a year after you’ve completed your plan, you should continue regularly checking to make sure all of the bed bugs are gone.
Step 3: Controlling the Spread
Use silicone caulk to seal any cracks and crevices that the bugs may be hiding in so that you can get them out in the open. You will also need to remove items that are infested with bed bugs and place them in a sealed plastic bag to treat them—more about that later. Anything that you can’t treat needs to be placed in a well-sealed plastic bag or storage container for up to a year to ensure that any active bugs on the item are killed.
Protective covers for mattresses and box springs that seal are ideal; upon use, the bed bugs get trapped inside and die. Vacuum after each use and immediately dispose of the bag, sealing as tightly as possible and discarding in an outdoor trash container.
Any furniture you decide to get rid of should be discarded with care so that other people are not tempted to bring them into their home. Methods include ripping covers and stuffing, destroying supports, and spray painting “bed bugs” on the furniture. Have anything you discard picked up as soon as possible by trash collection, and try not to discard any furniture if you can safely rid it of bed bugs.
Step 4: Down to Business
Time to get down to the nitty gritty and kill those bloodsuckers for good. Make sure whatever methods you choose to use at home are safe, and more importantly, legal. Avoid treatments that don’t work: rubbing alcohol, gasoline, and kerosine can harm you and your family and can also easily ignite, and sticky traps are not for bed bugs.
For non-chemical bed bug treatments, some may be more or less helpful so consider each carefully.
Heat treatment is one of the methods that can be used, as clothing dryers on high heat or black plastic bags in hot cars in the sun are effective at killing bed bugs on isolated objects. However, do not increase your home’s temperature as it is ineffective and dangerous. If you need whole-house heat treatment, you will need to call a professional.
Inversely, cold treatment can also sometimes work for isolated items, but generally is only effective in the home setting if your freezer reaches 0 degrees Fahrenheit. Use a thermometer to check and monitor the temperature and be sure it’s at 0 degrees Fahrenheit, and leave the item in the freezer for at least three days.
Steam cleaners are good for getting into fabrics, cracks, baseboards, bed frames, carpets, and other furniture, but the temperature must be at least 130 degrees Fahrenheit and the device cannot have a forceful airflow or it may cause the bed bugs to scatter.
Step 4.5: Chemical Treatment and Bed Bug Control
If you decide to use pesticides, be sure to read the directions very carefully and follow them to the letter. You will want to look for EPA-registered pesticides that have bed bugs listed on the label, and should you to use a fogger (or “bug bomb”) be sure to use with extreme care and only if the label lists bed bugs as an affected species. Do not use foggers are your only method of treatment, and do not use improperly as they can cause fire, explosion, or health risk. Do not use pool- or food-grade diatomaceous earth.
Check regularly to be sure that the bed bugs are gone. If they aren’t, you may need to re-treat as either you missed some or eggs may have hatched.
Desiccants have been reported as effective, and there are options for both commercially bought and DIY bed bug traps.
If you’d like further great tips like this, look no further than Total Pest Solutions. We have your safety and pest prevention in mind.
continue reading
Related Posts
Early Lovebug Prep in Winter Haven: Protecting Exteriors Before Swarms
Davenport’s Pine Beetle Threats: Protecting Trees in Dormant Season As
Winter Roach Hotspots in Lakeland: Kitchen & Bathroom Prevention As


